
One of the key challenges in presentations is effectively conveying data. To make the information more engaging and easier to comprehend, it’s recommended to use visual aids rather than text. Map infographics, for instance, provide a quick and clear representation of data, allowing audiences to process and understand the information more efficiently at a glance.
Why use map infographics?
Maps can be a powerful tool for adding geolocation data to your presentation. They are particularly useful for geography and history teachers, as well as for business and international presentations, helping to explain country-specific data, expansion strategies, or market size. Maps are also valuable in language instruction, tourism to outline travel routes, and for discussing territorial or international policies.
Infographic maps offer significant advantages by presenting information more clearly and visually, making slides more readable and attractive while capturing audience attention. Combined with icons, which we’ll cover later, they enhance accessibility, as icons are universally understood across languages.
Pro Tip: Creating a custom map can be time-consuming. At GreatPPT, we offer a wide range of free, editable PowerPoint map infographics. These templates come in various styles and formats to inspire you and help you choose the best option for your presentation.
Insert a map into your presentation
Once you have selected the GreatPPT template that interests you, download it by clicking on the “PowerPoint” button and open it. And now you can start editing!
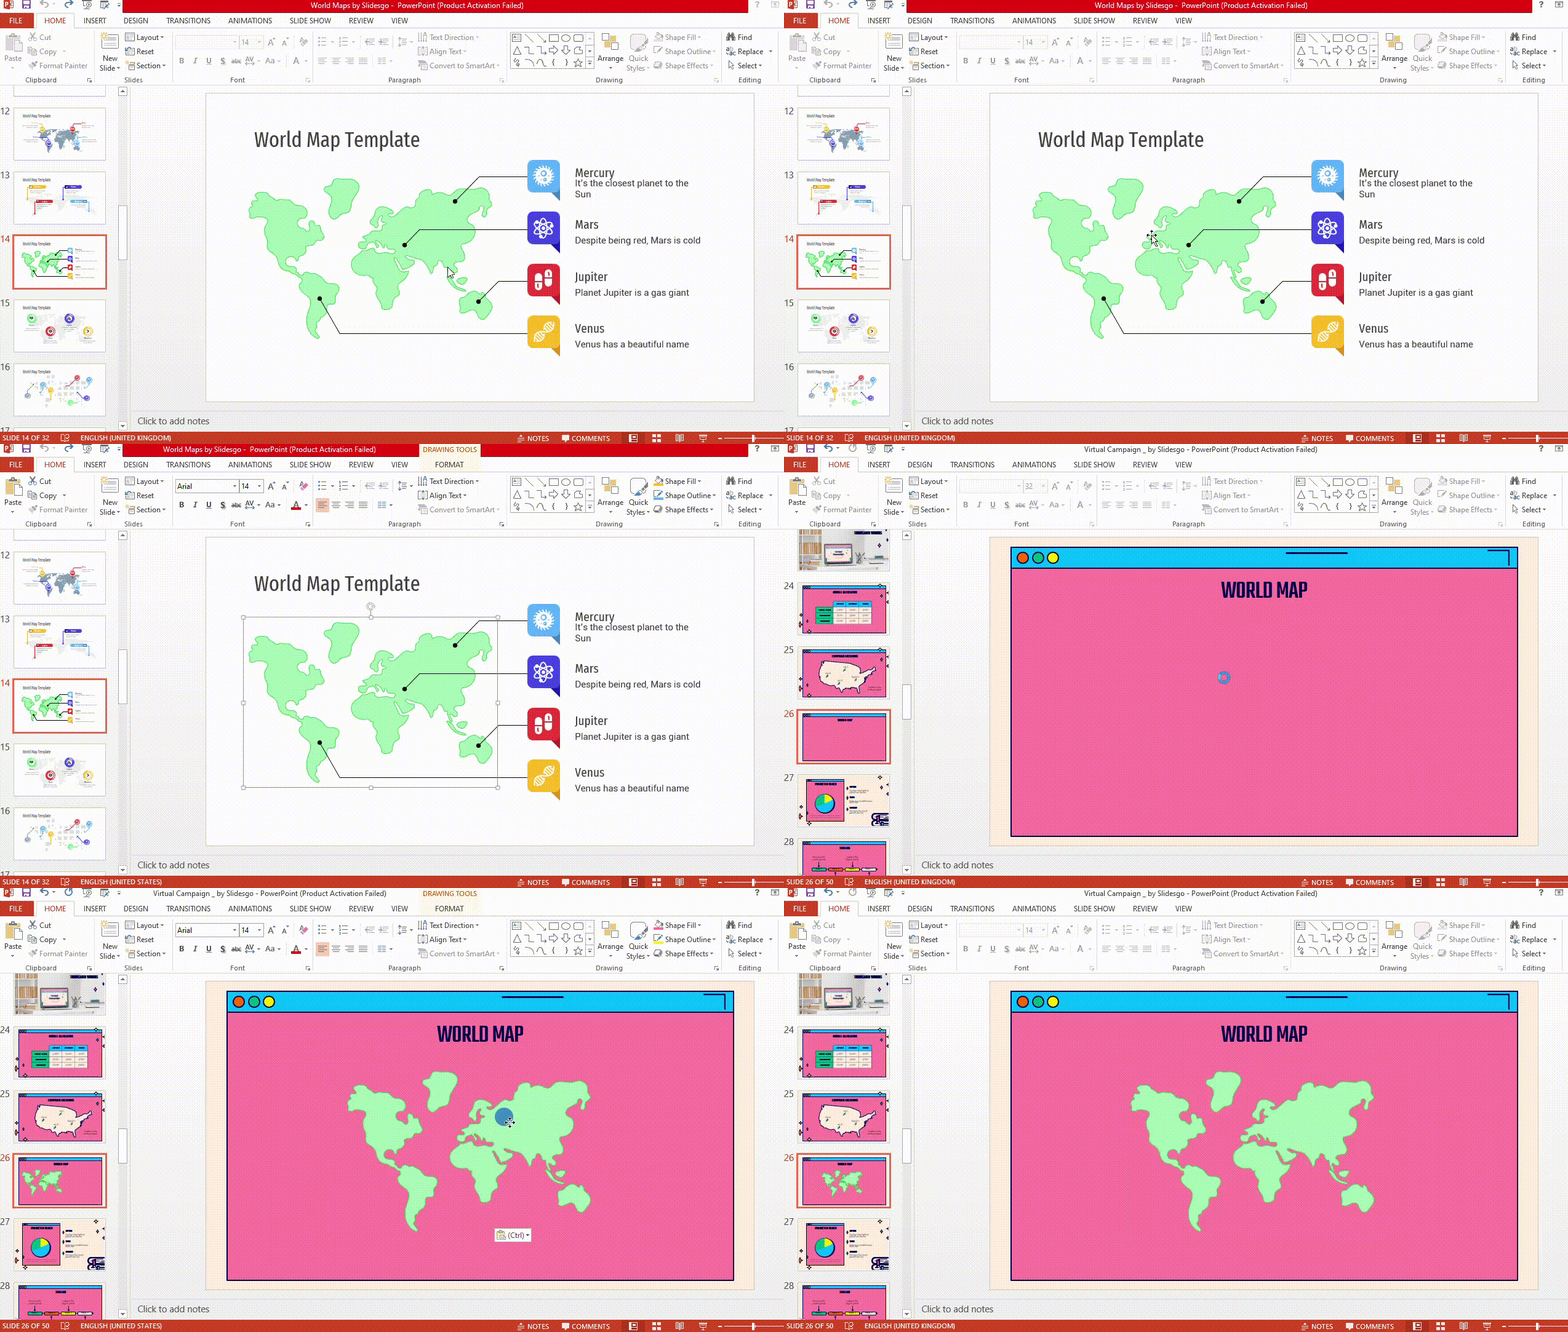
If you need to insert a map infographic into another PowerPoint file, select the map you want, copy it and paste it in the slide you want. Now you can move and adjust it. Let’s see an example:
Modify your map colors
You can adapt your map infographic to the colors you like the most, as always, we recommend that you use the theme colors to follow the style and harmony of the presentation.
Select the area of the map you want to modify, click on the Shape Fill option and select the color. Et Voilà!
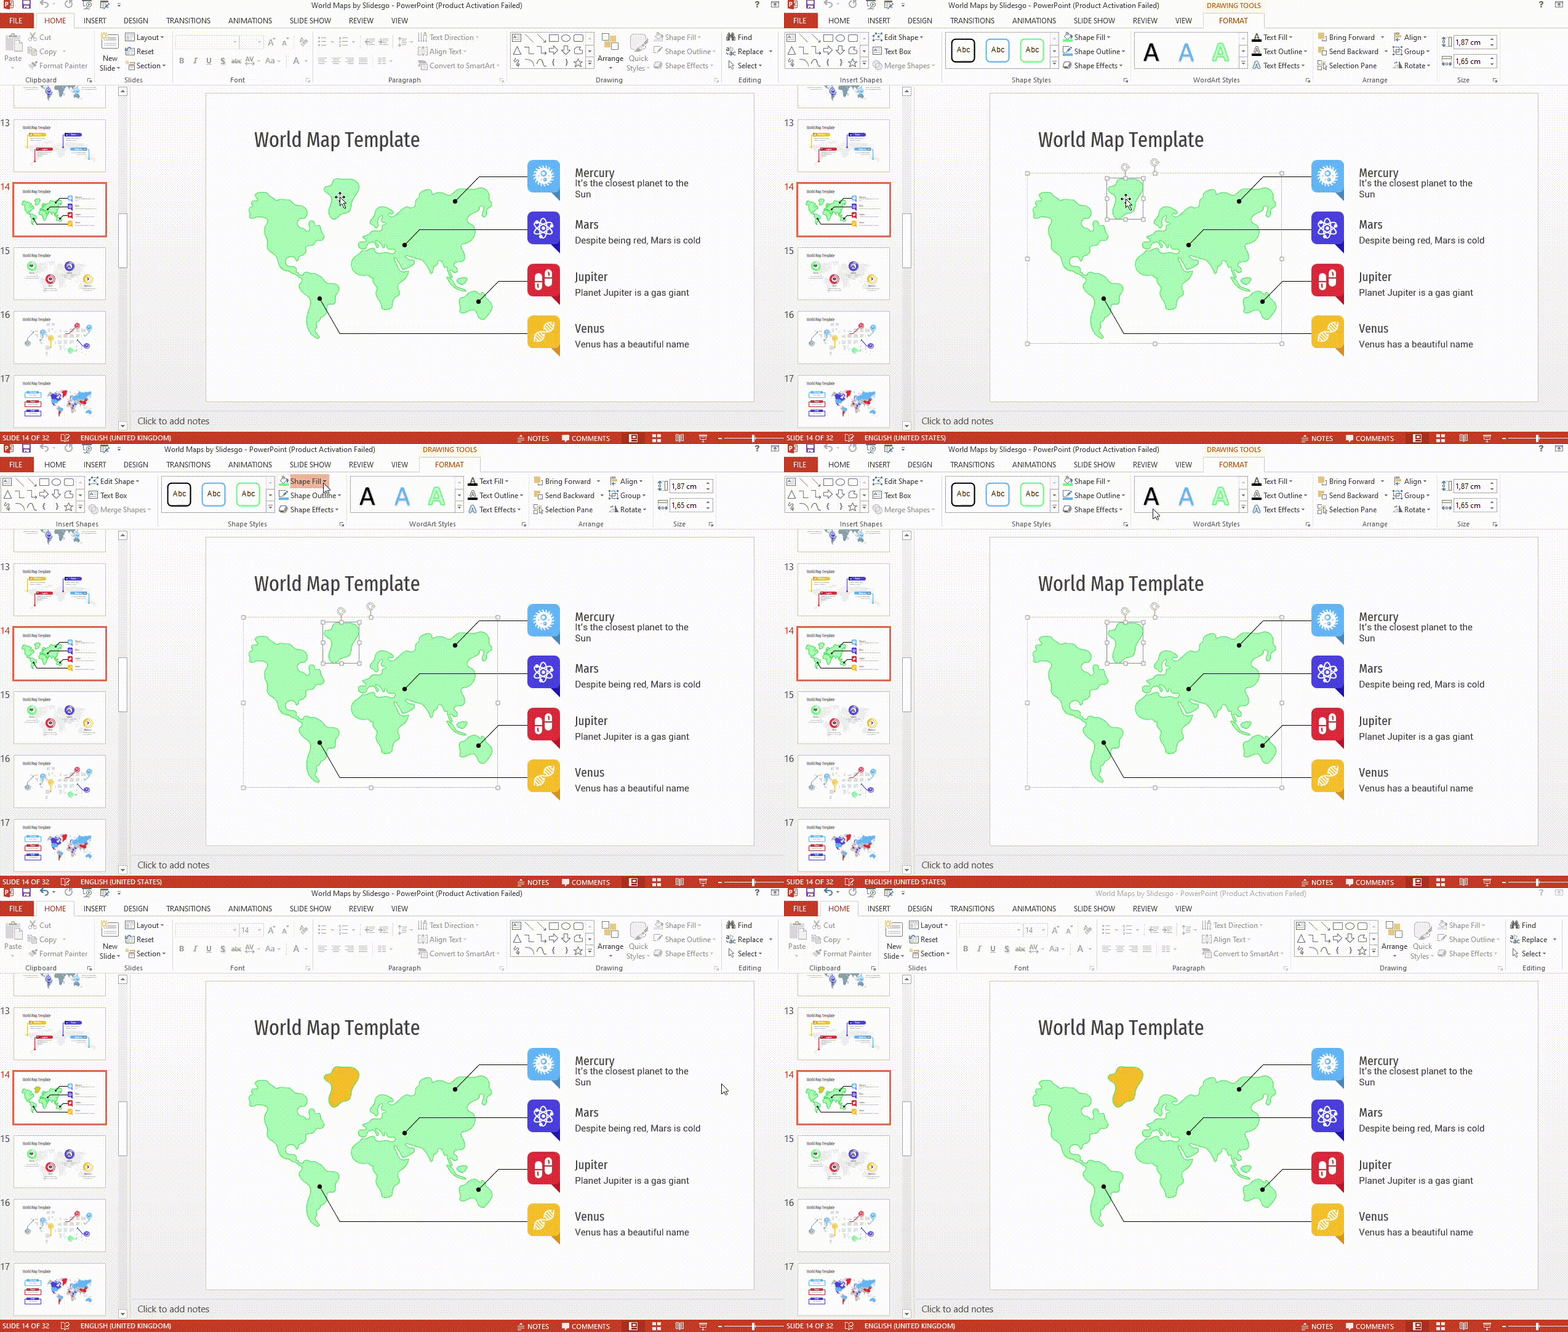
Follow this same process to change the background color of the slide, selecting the slide instead of the map.
Insert and modify text on the map
Map infographics are a very attractive graphic resource, but sometimes that alone is not enough. You may need to include short texts that help your audience follow the thread of the topic.
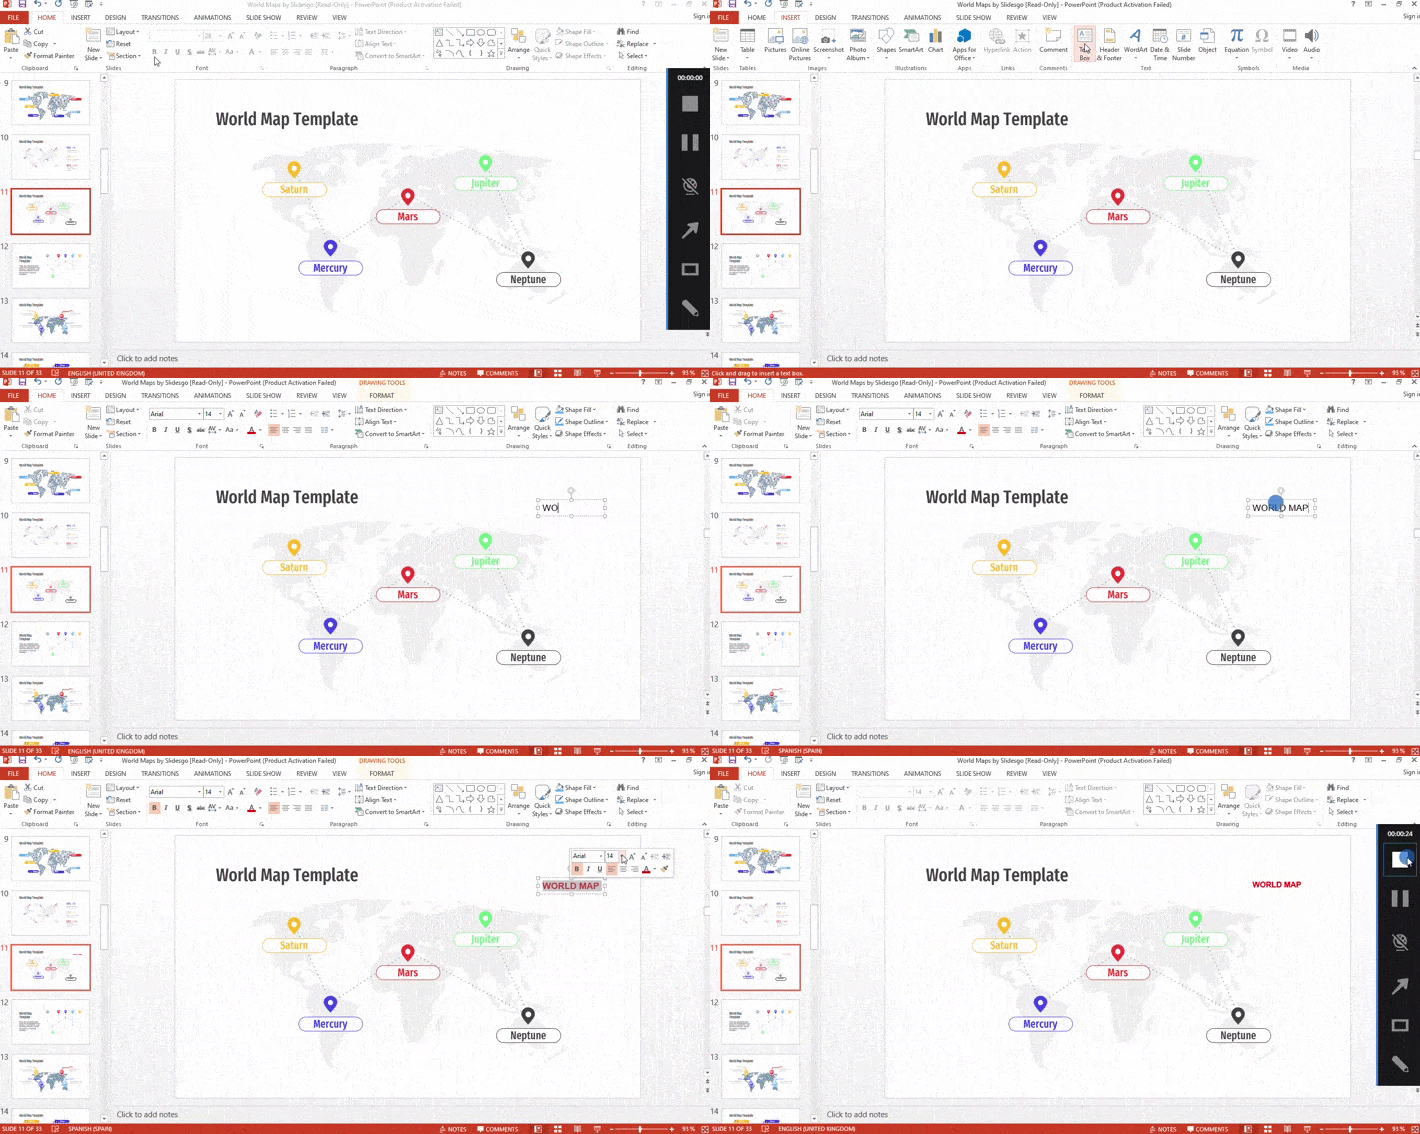
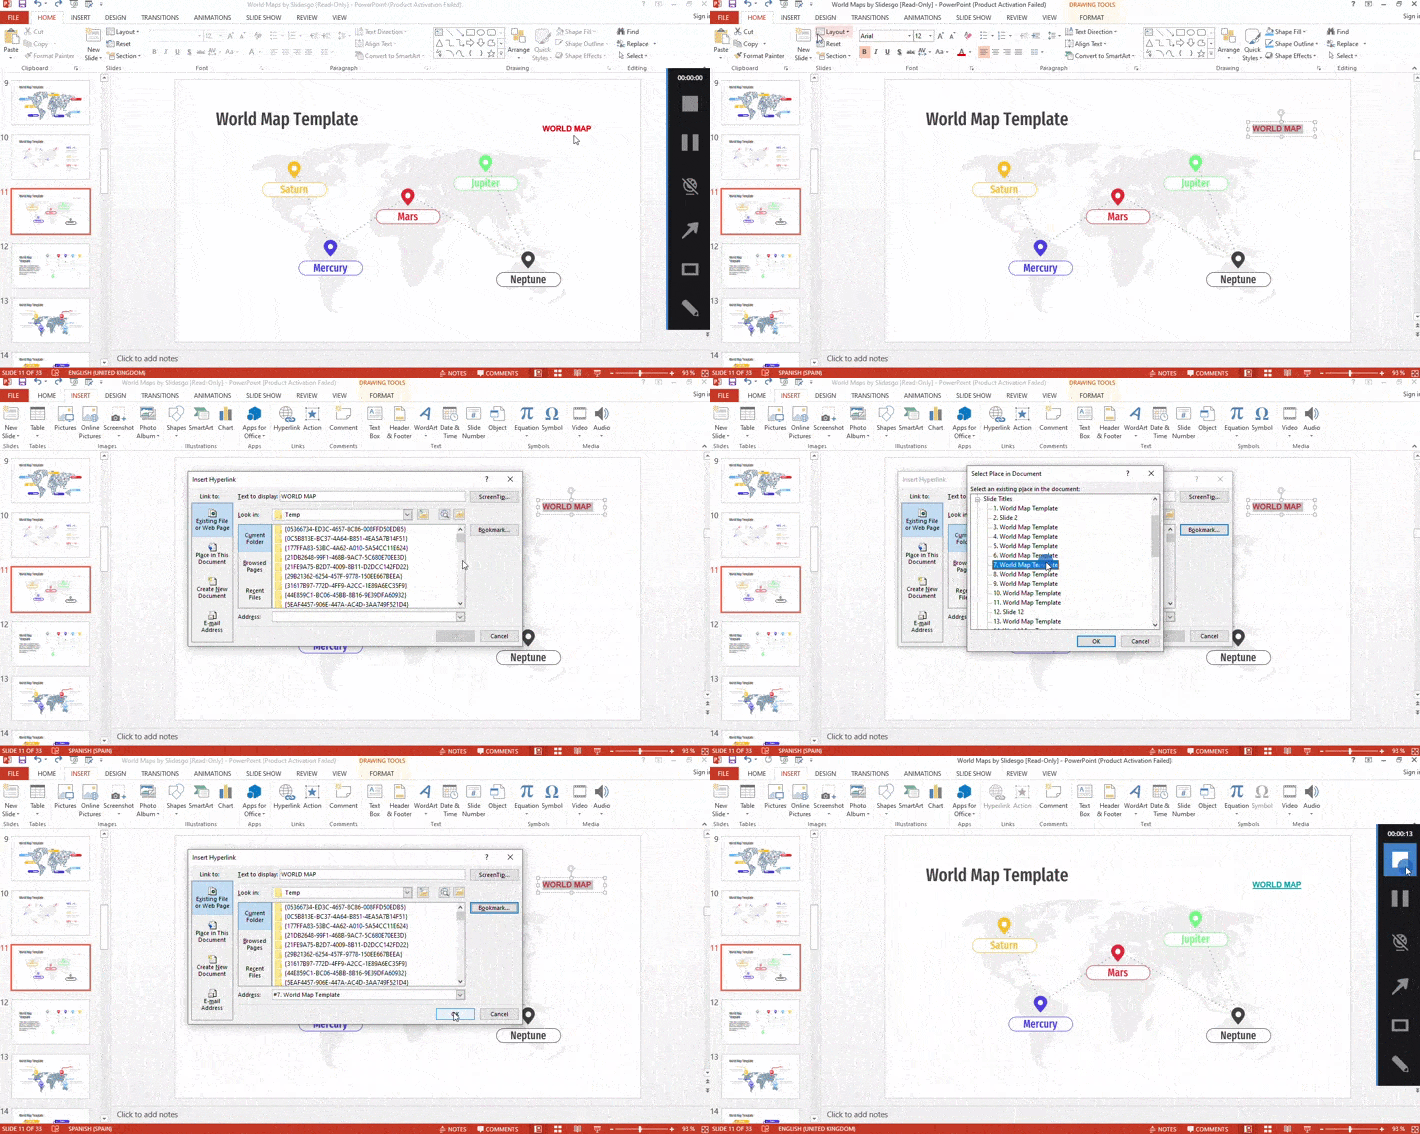
You can easily insert them. Go to the slide where you want to add the text and click on the Insert tab on the toolbar. Click on the option Text Box. Choose in which area you are going to place it and draw the size you need with the mouse. You already have it!
Now you can write the information and format it, change the size, color, font, alignment, etc. Select the text, go to the Home tab of the toolbar and modify what you need. Let’s see how to do it:
Pro tip: You can also add internal and external links. Select the text you want to add the link to. Go to the Insert tab on the toolbar. Click on Hyperlink and paste the link.
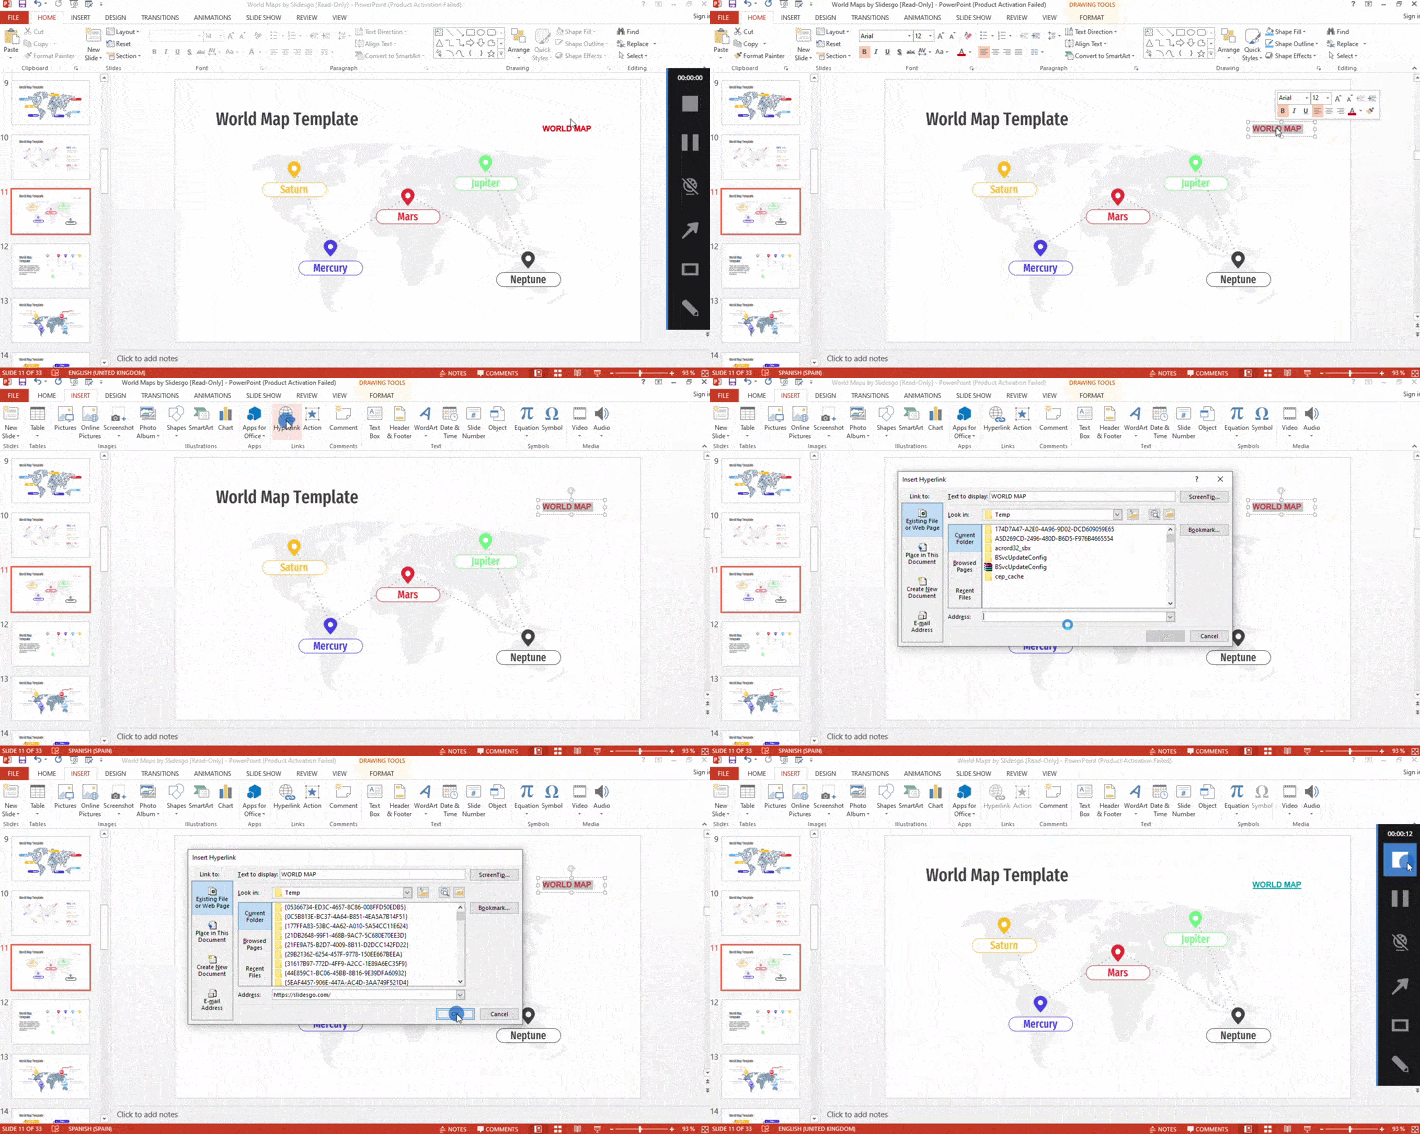
If you prefer to add a bookmark that leads to another slide in the presentation, click on Insert – Hyperlink. Select the Bookmark option. All the slides will come out. choose which one you want the link to take you to and click OK.
Add and change icons on the map
Icons are another very useful graphic resource for saving text. You can use them to contextualize the data you include on your map slides.
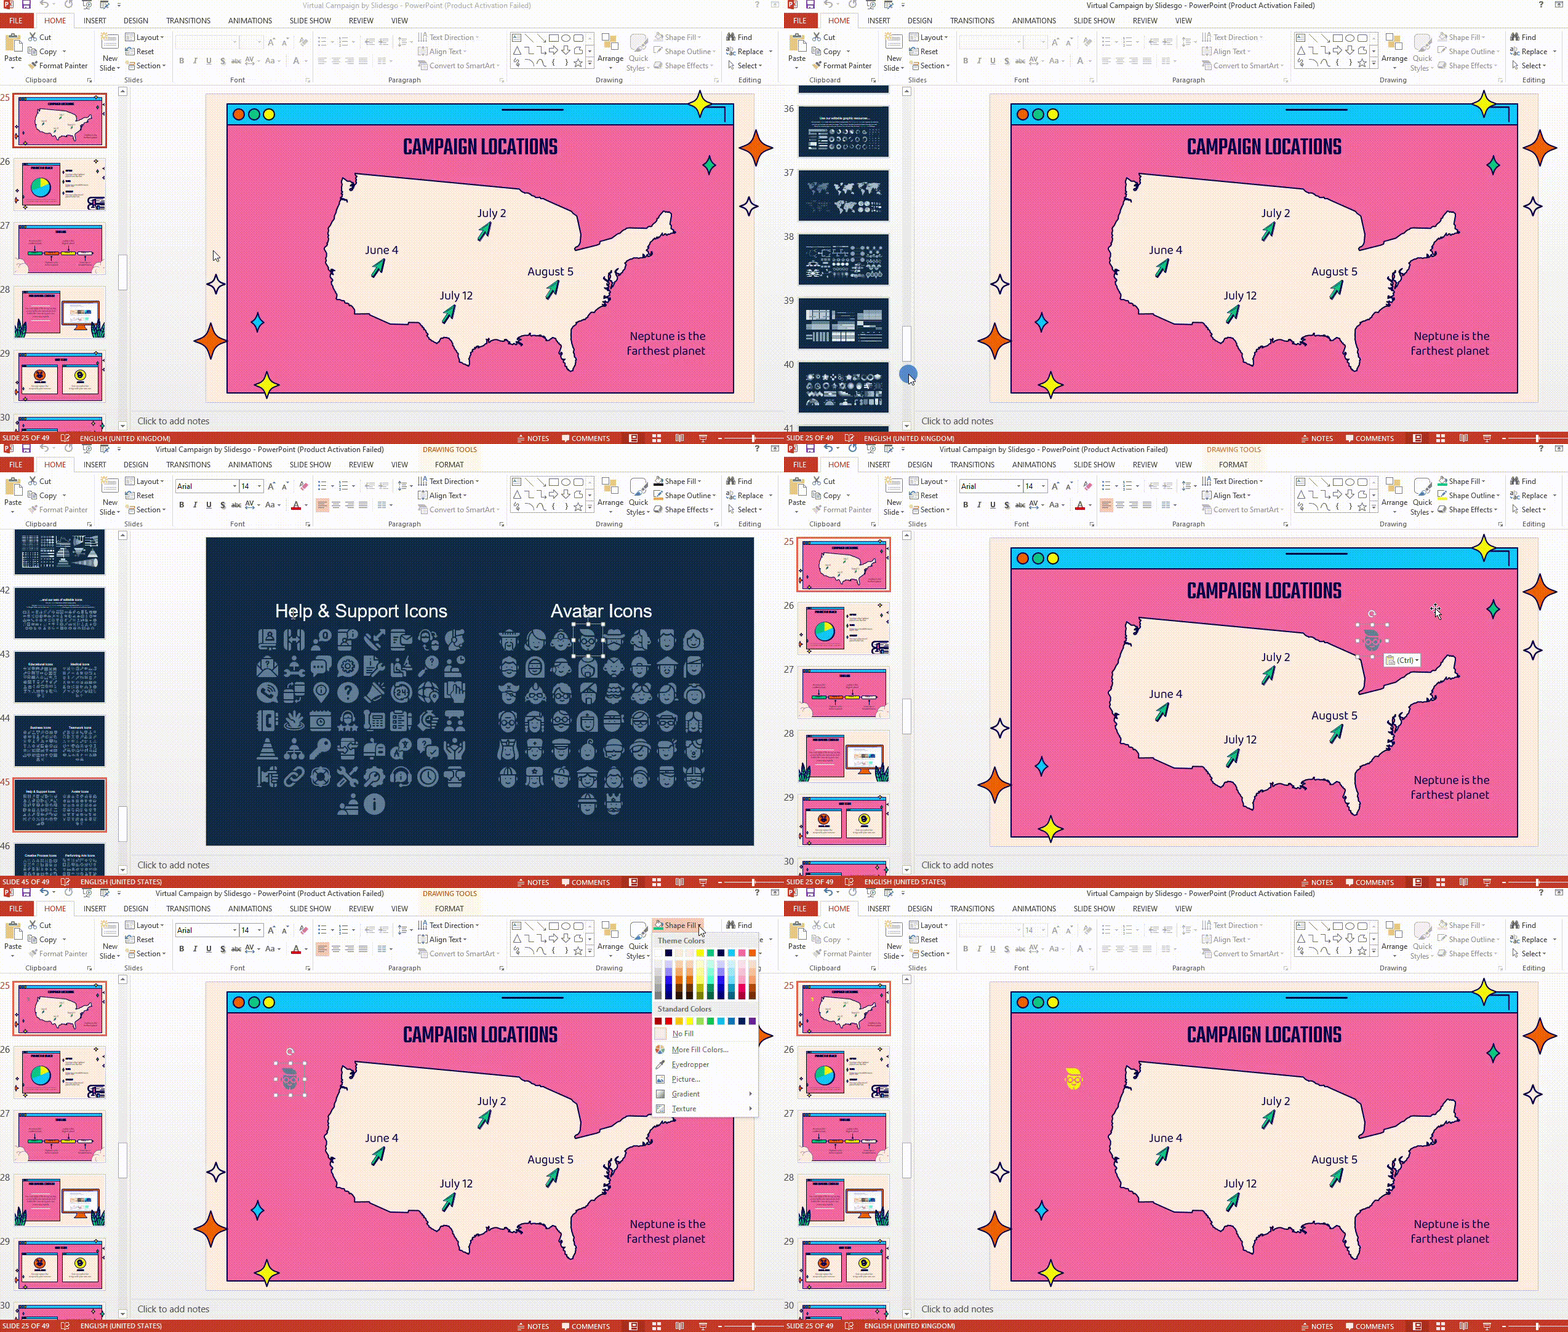
At the end of GreatPPT templates you will find slides with alternative icon resources. Select the most representative for the information you need to explain. Copy it, go to the slide where you want to insert it and paste it.
Now you can move it to the area where you want to put it. You can also change the color. Select it, go to the Format section of the toolbar. Click on the Shape Fill option and choose the color you want.
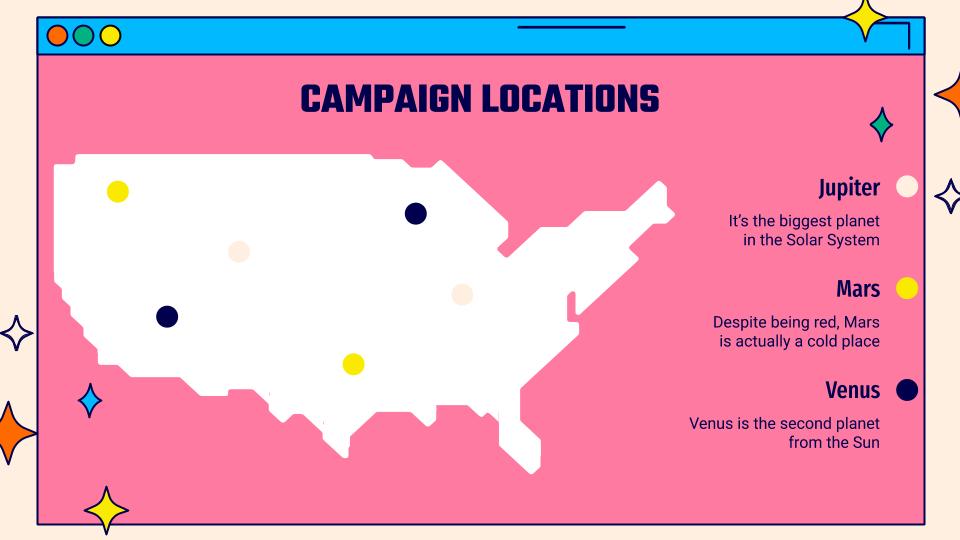
Finally, if you are going to use several icons, include a brief legend on the side of the slide to explain the meaning of each icon. Try to make it brief, so as not to distract from the rest of the elements.
Now you know how to insert and edit map infographics for PowerPoint! Put it into practice by downloading the new free PowerPoint templates from GreatPPT.
