
When we talk about 3D, we’re referring to three-dimensional objects—those that have length, width, and height. Humans naturally perceive the world in 3D, as we can discern the dimensions of the objects around us.
3D objects also play a significant role in graphic design, and incorporating 3D elements into your PowerPoint presentations can add an original and, most importantly, realistic touch.
In this post, we’ll guide you on how to insert 3D elements into PowerPoint to make your presentations stand out. And don’t worry—you won’t need the classic red and blue 3D glasses to follow along! Let’s dive in!

While it would be fantastic to have the capability to edit and insert 3D resources directly in Google Slides, this feature is currently only available in PowerPoint. If you need to share your presentation or store it in the cloud, you can first make your edits in PowerPoint and then upload the finished presentation to Google Drive.
Below, we’ll walk you through some techniques for editing and utilizing 3D resources in PowerPoint. Take note, because we’re about to begin!
How to insert stock 3D models in PowerPoint
PowerPoint offers quite a large amount of stock 3D models as you can find all kinds of elements, from simple geometric shapes to elements of any category and theme such as animals, furniture, avatars, dinosaurs, food and drinks, flowers and plants, sports, and many more. You can also find models with animations.
The procedure for inserting resources is very simple:
- Insert > 3D Models > Insert 3D model from… > Stock 3D models.
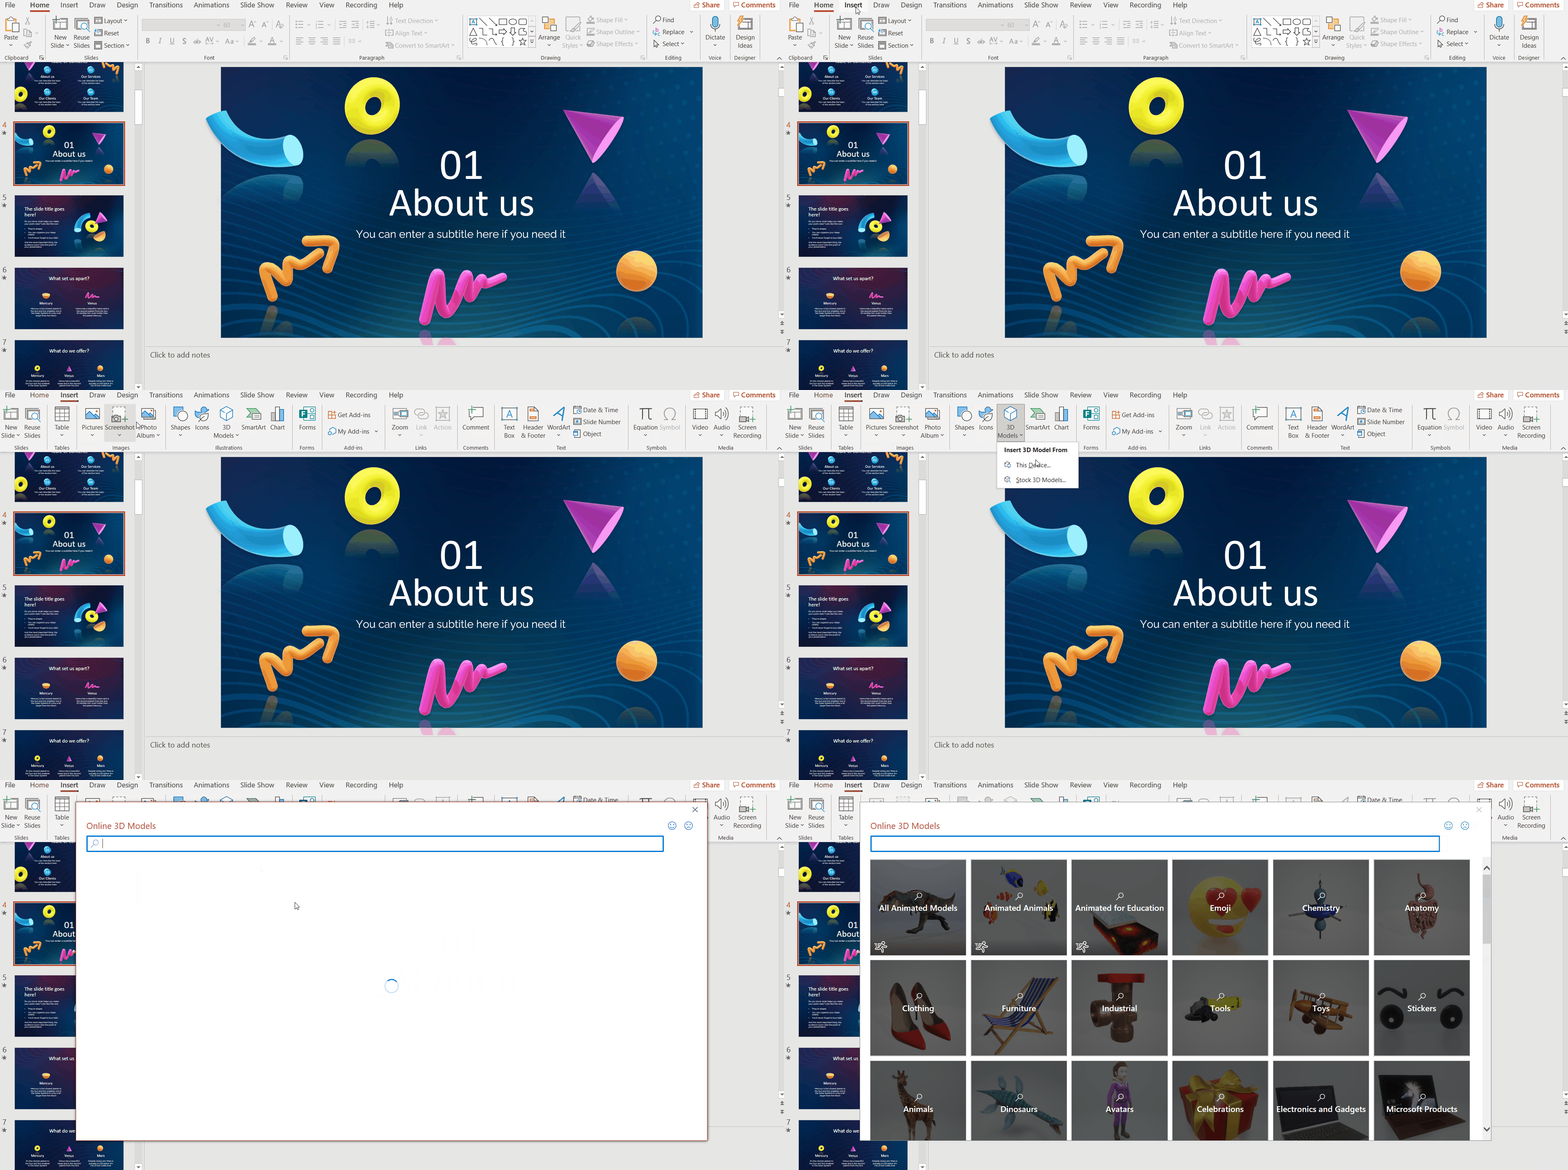
- Finally, choose the model you want. As we have mentioned, there is a wide variety of models, some of them animated, you just have to select the one that best suits the content of your presentation.
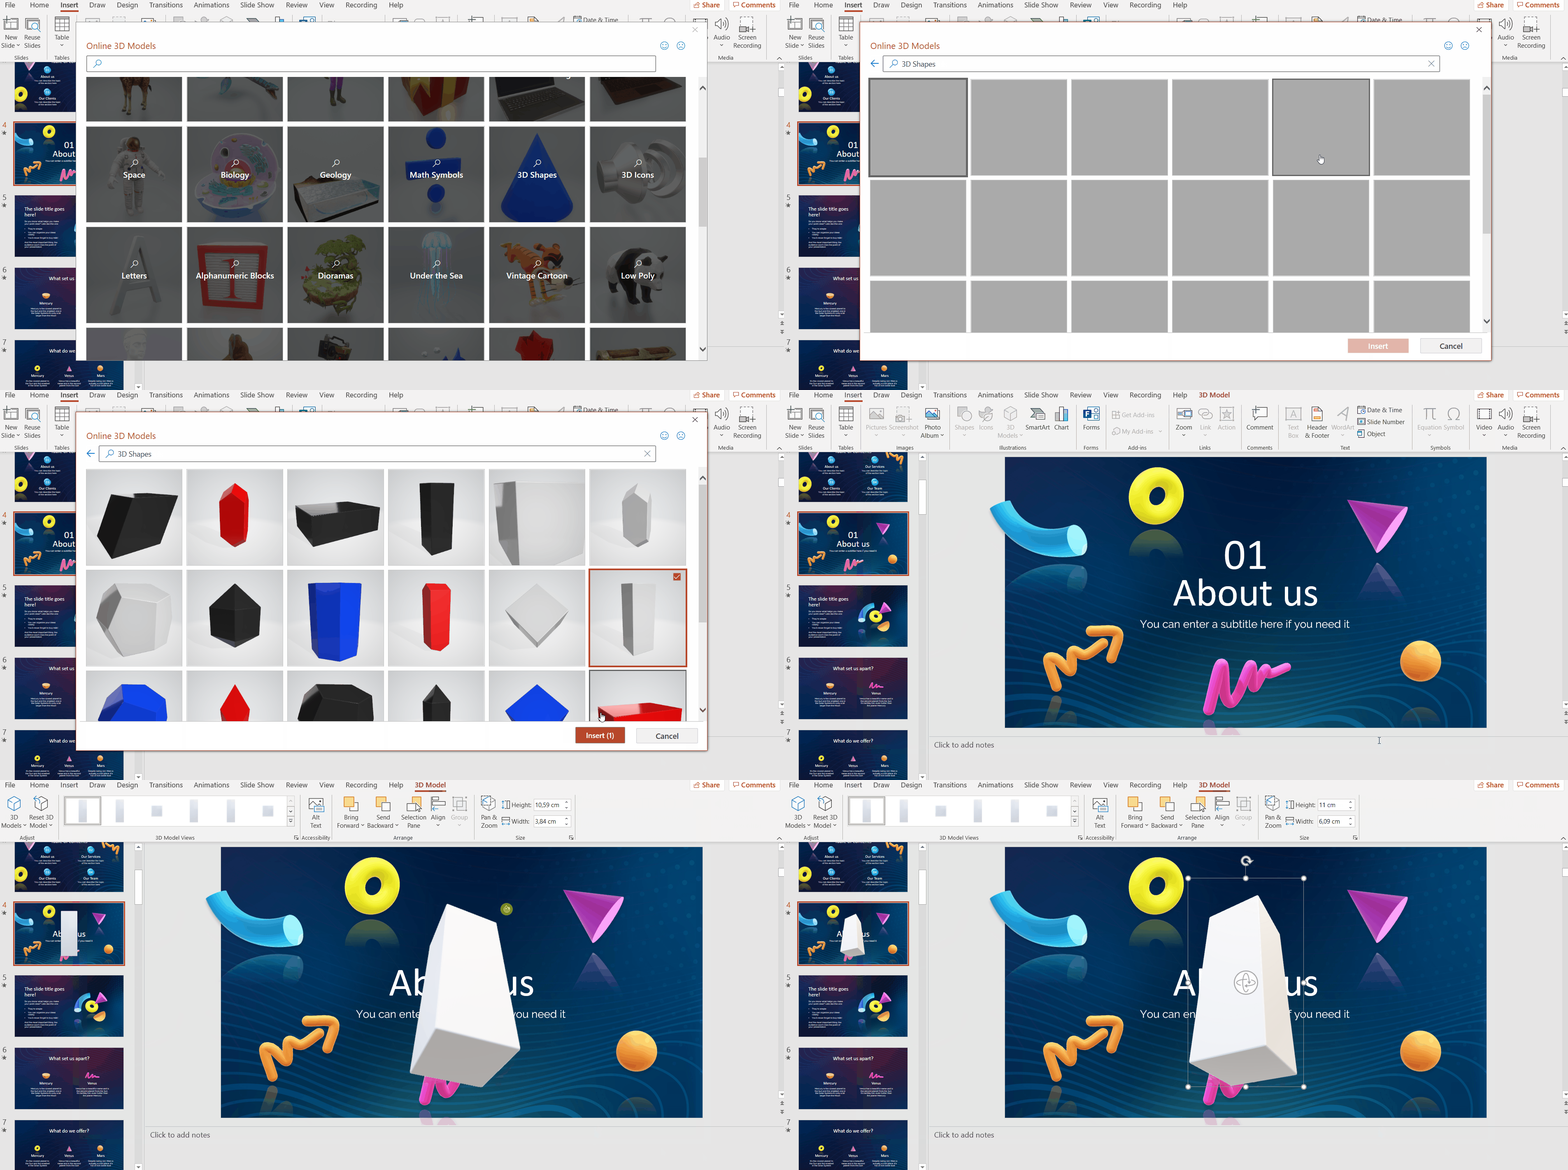
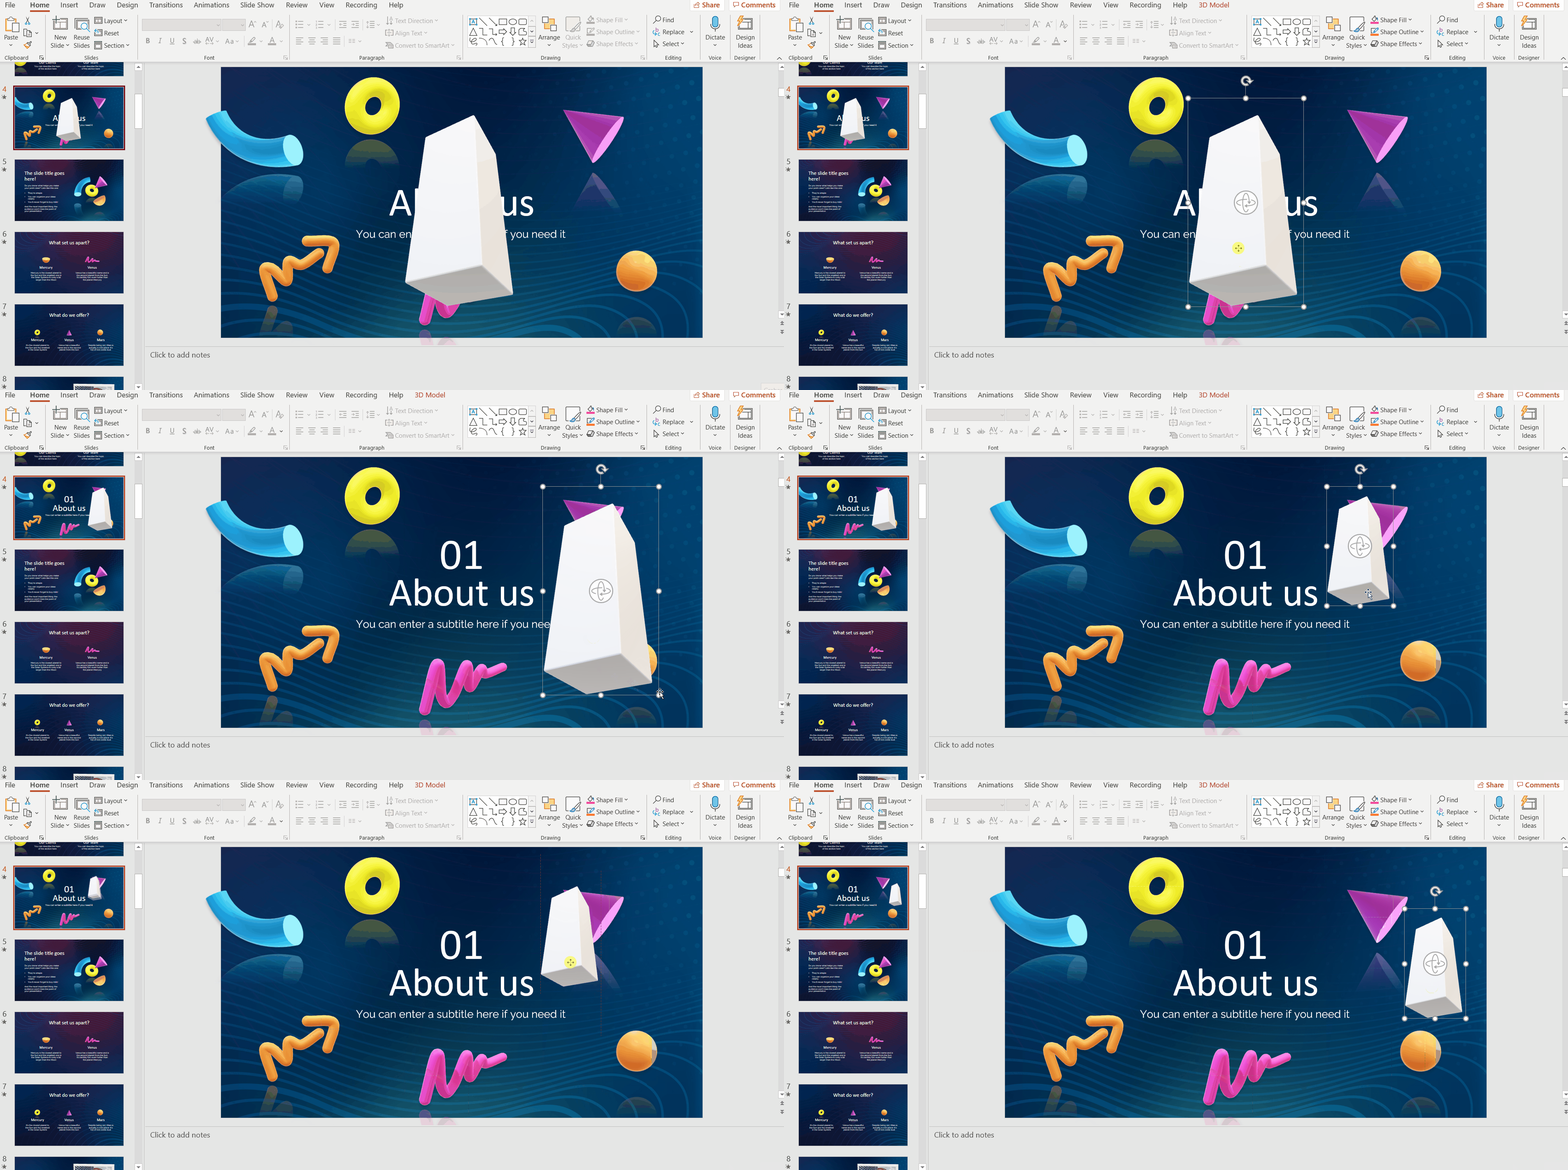
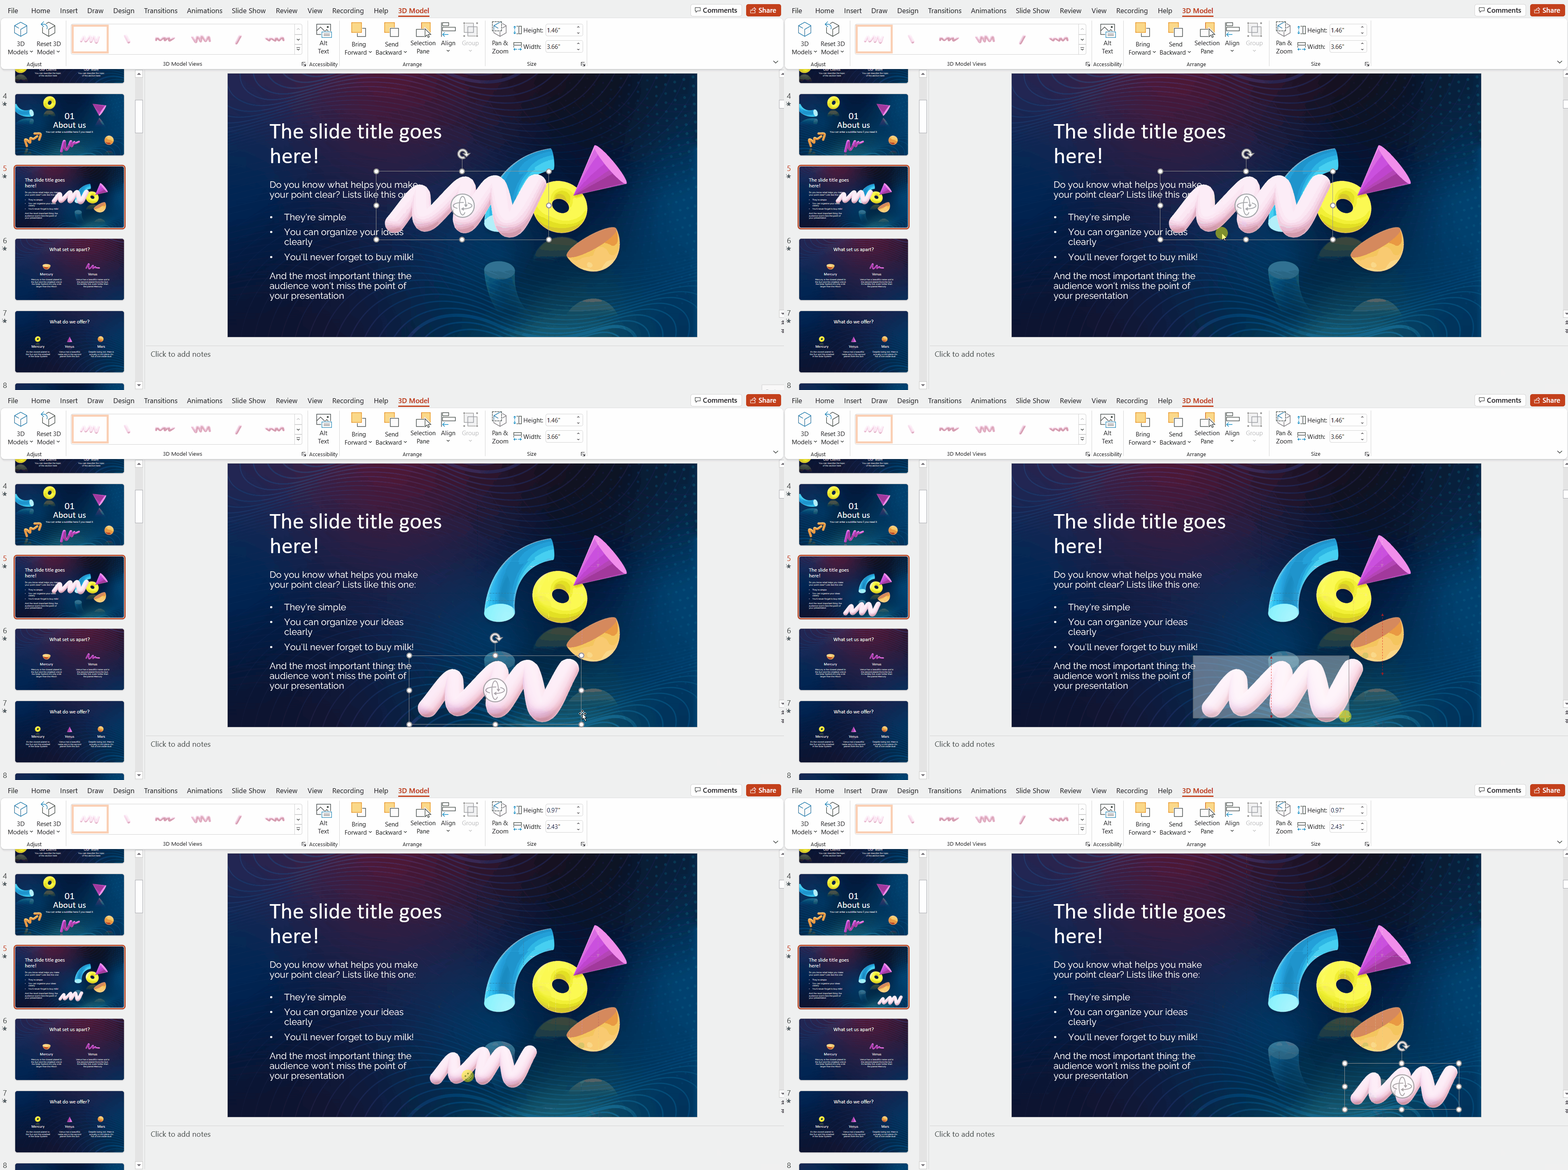
- Place the element wherever you want and with the size and orientation, you need.
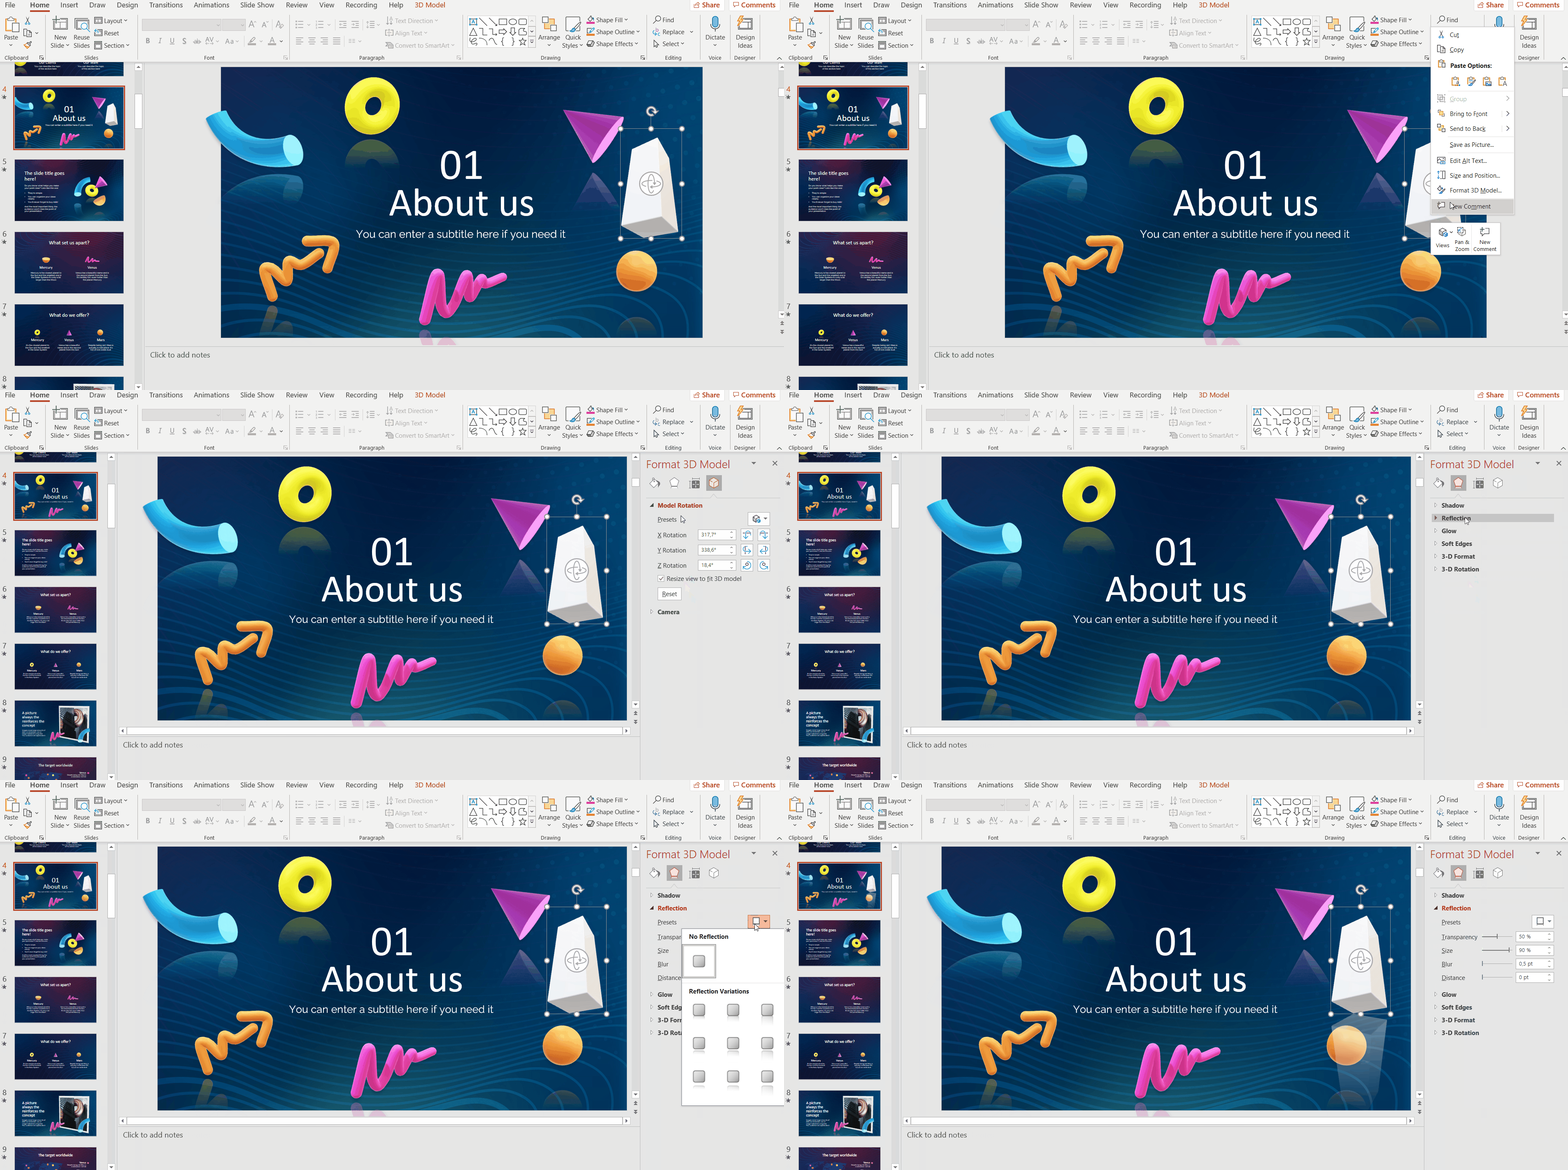
- You can also modify the format of the 3D model, for example, add a reflection effect: Right-click on the model > Format 3D model > Effects > Reflection.
How to create 3D elements
Another way to include 3D elements is to create them from scratch, and then insert them into your presentation. For this, we will use the Paint 3D application.
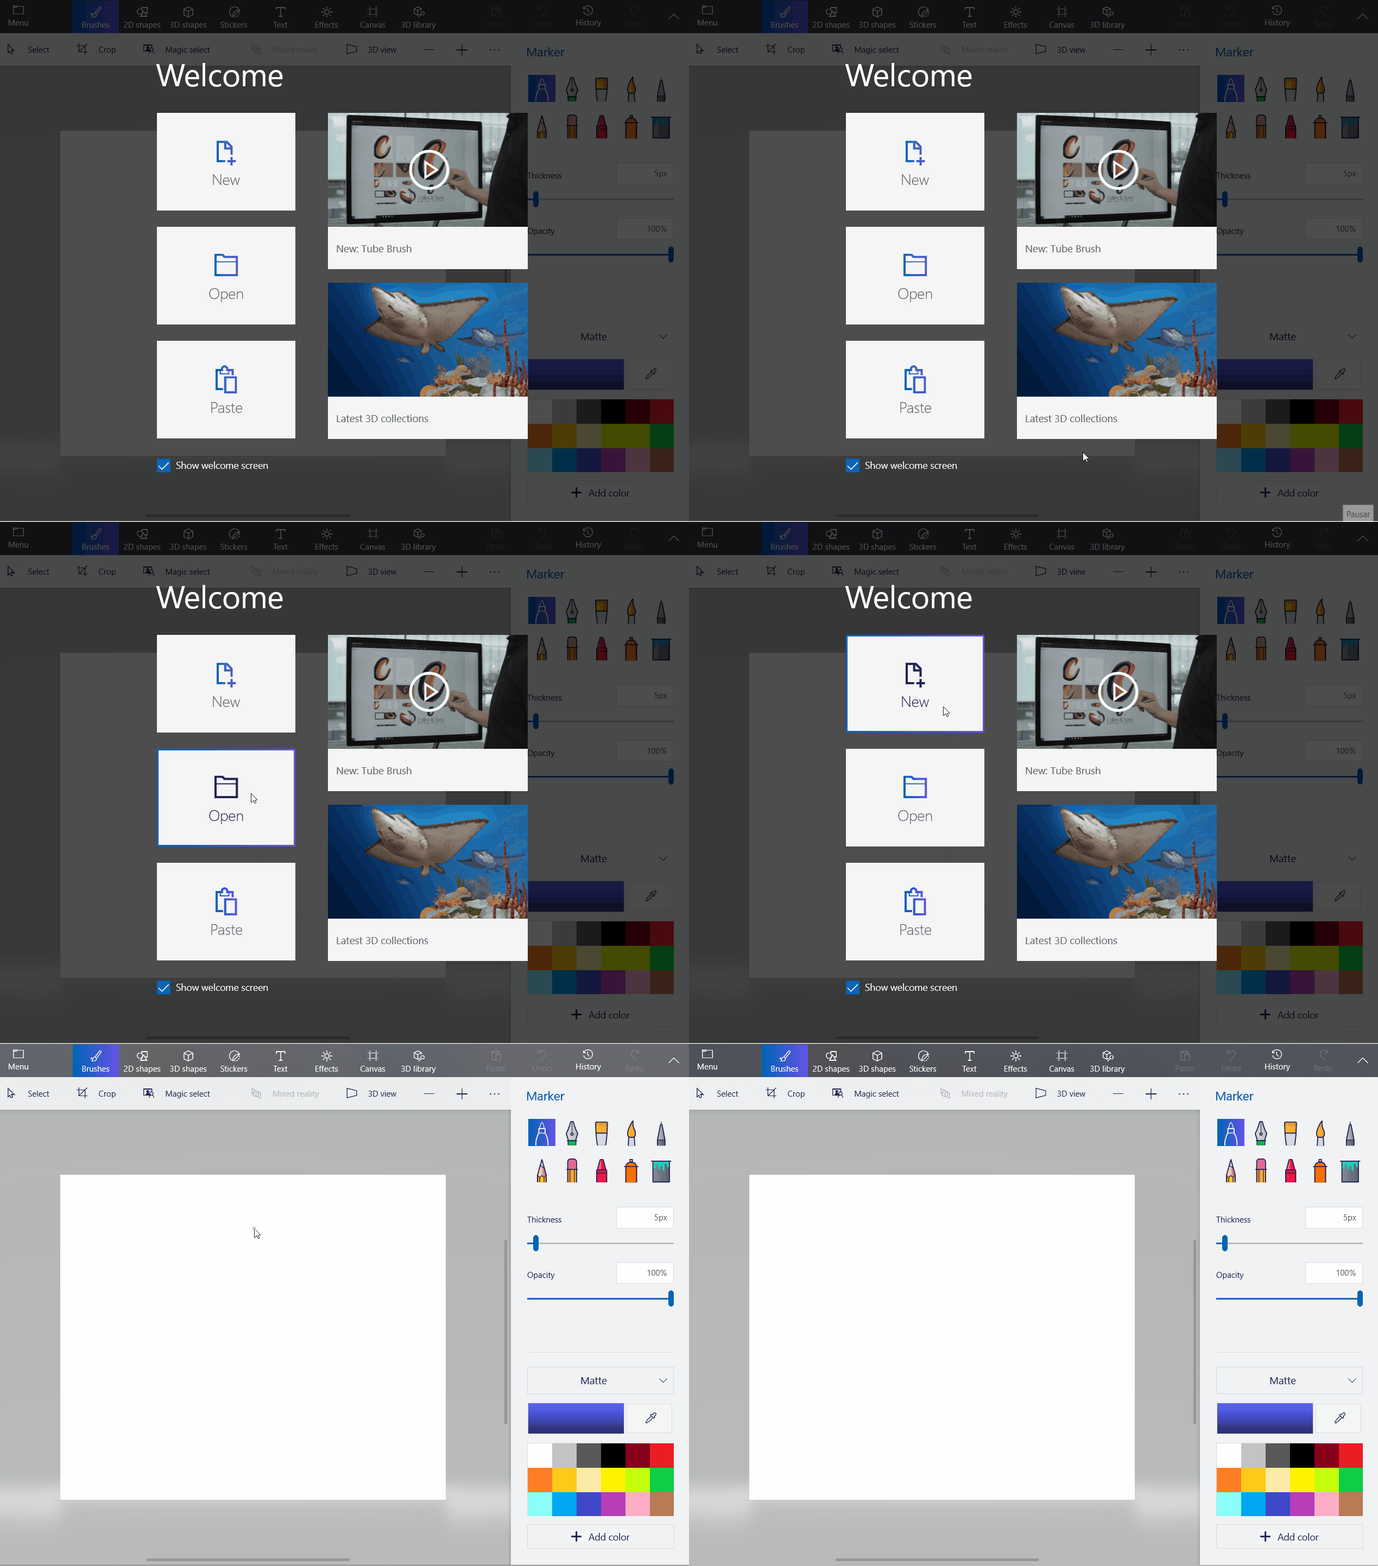
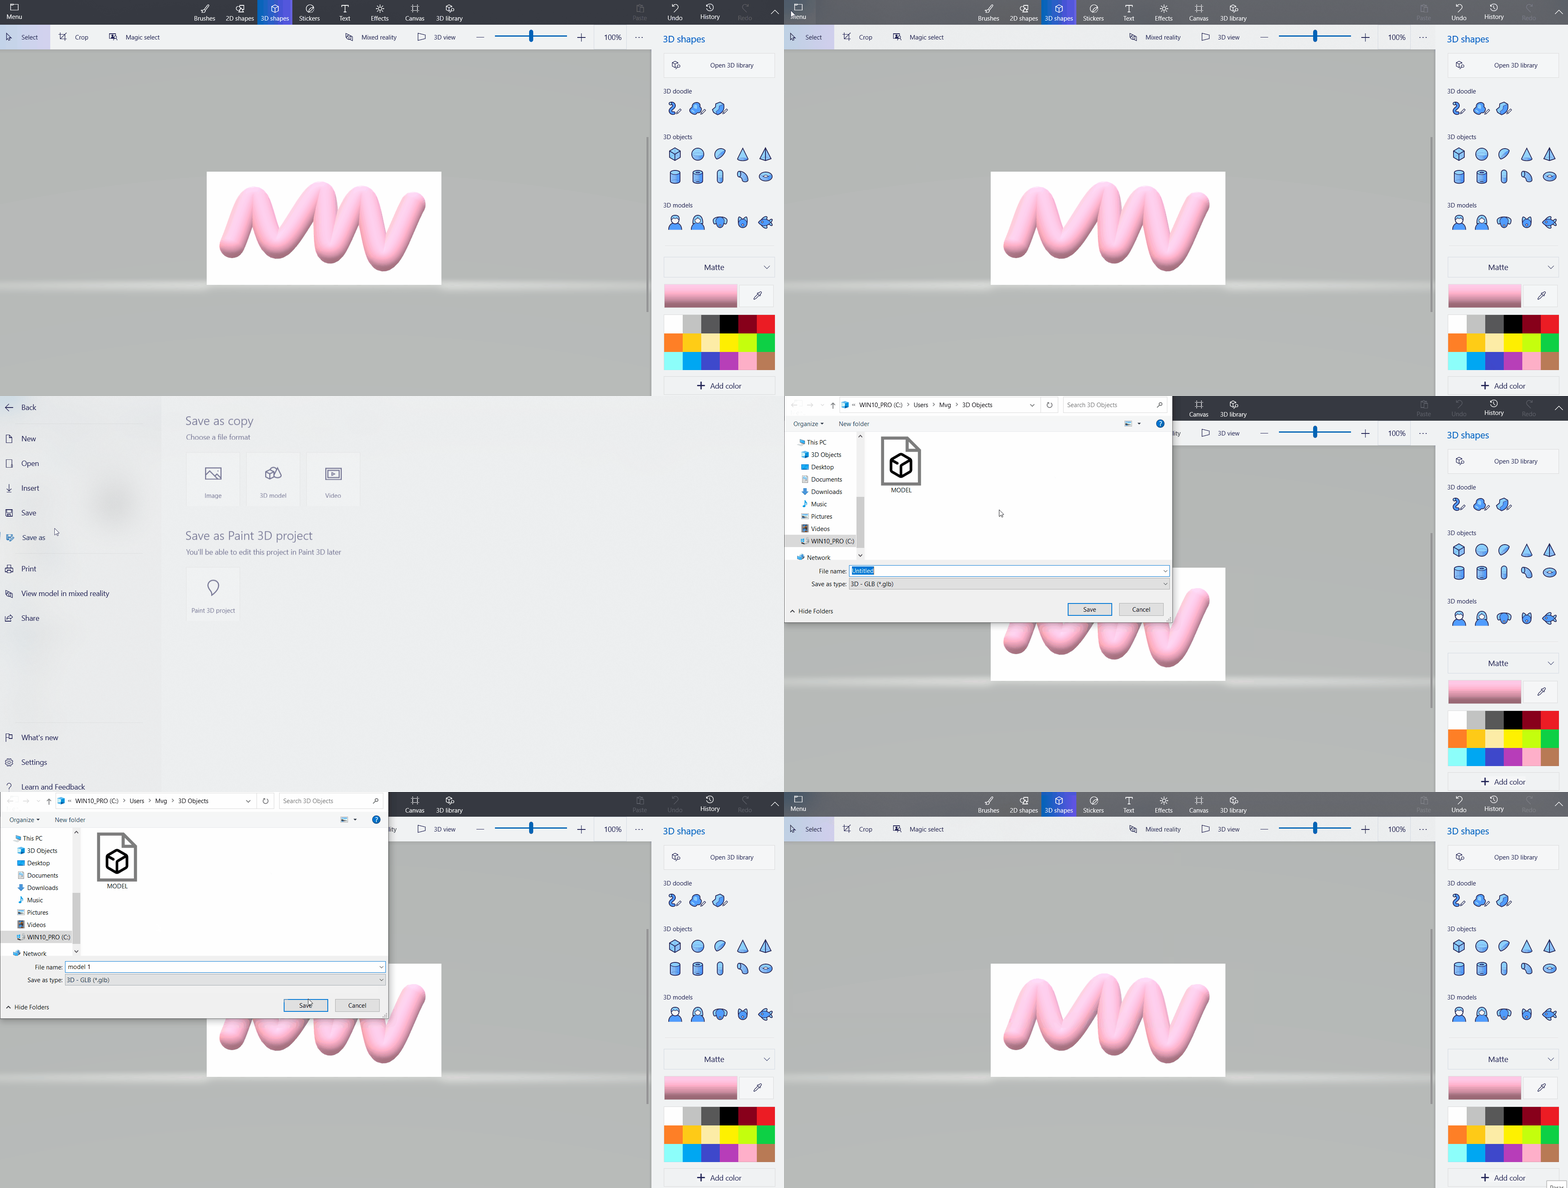
- Click on 3D Shapes. In this way, we will be able to insert, with the format we want, doodles, objects, or 3D models.
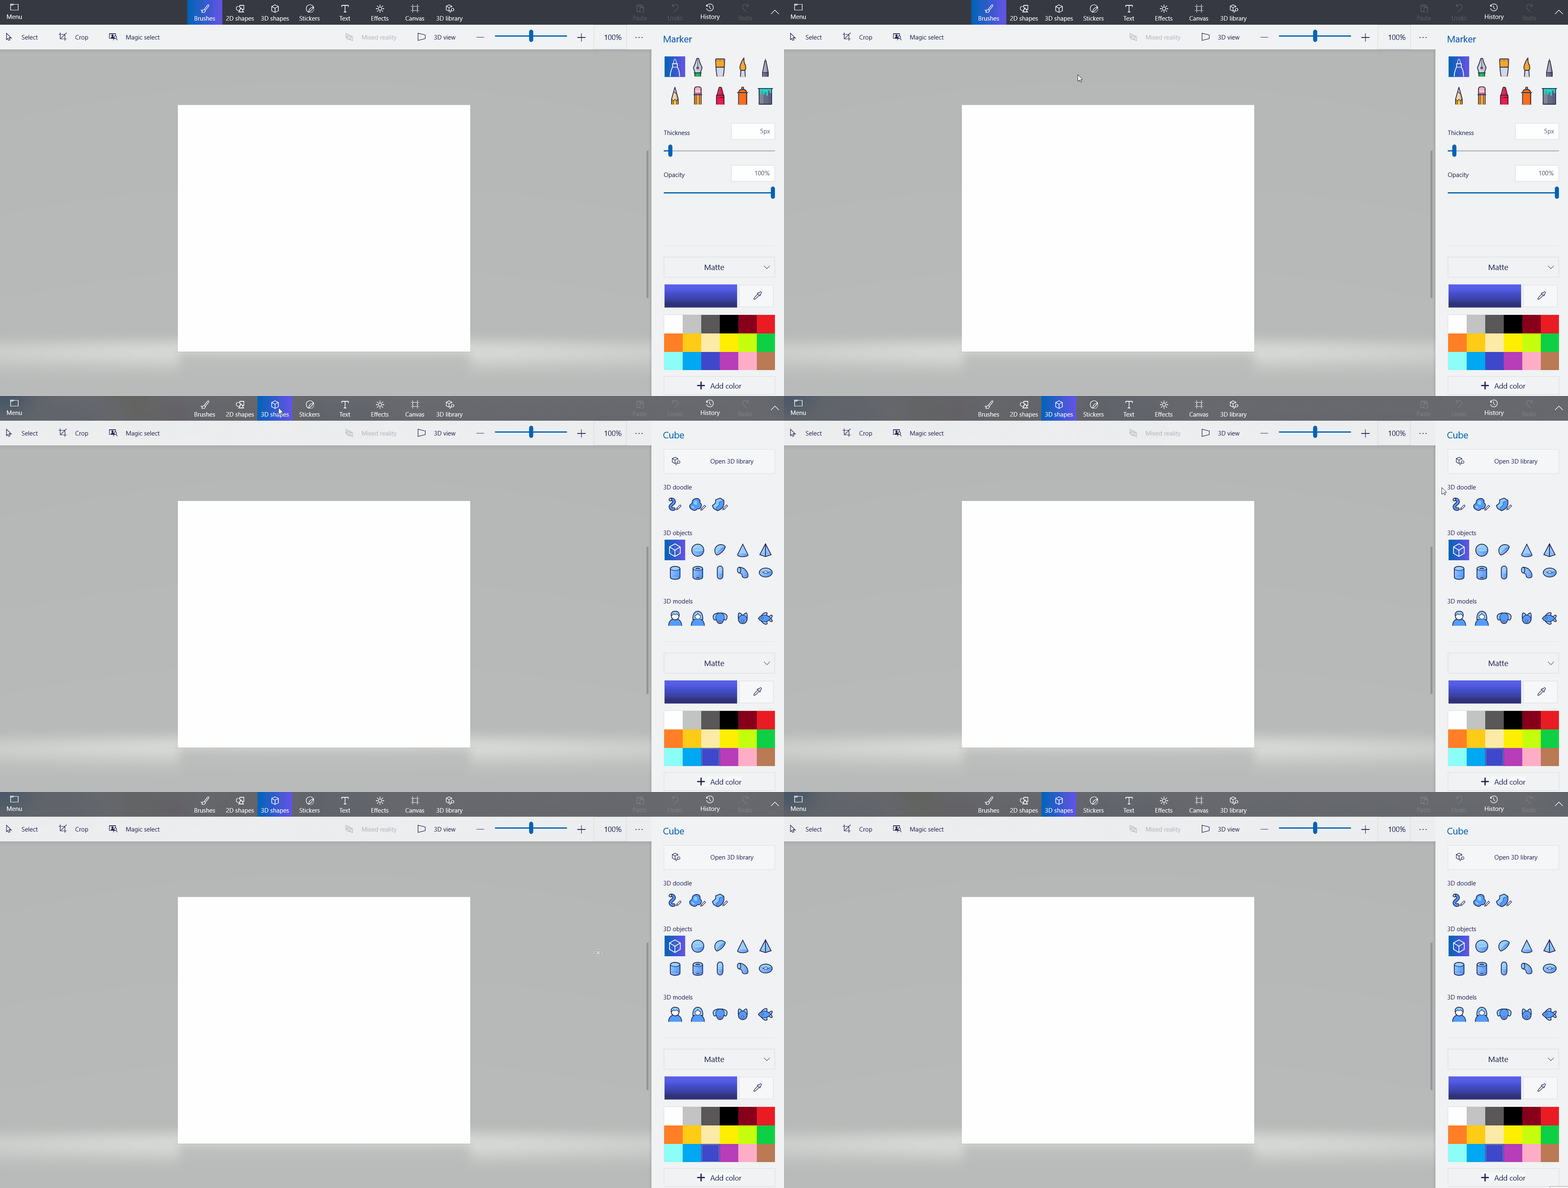
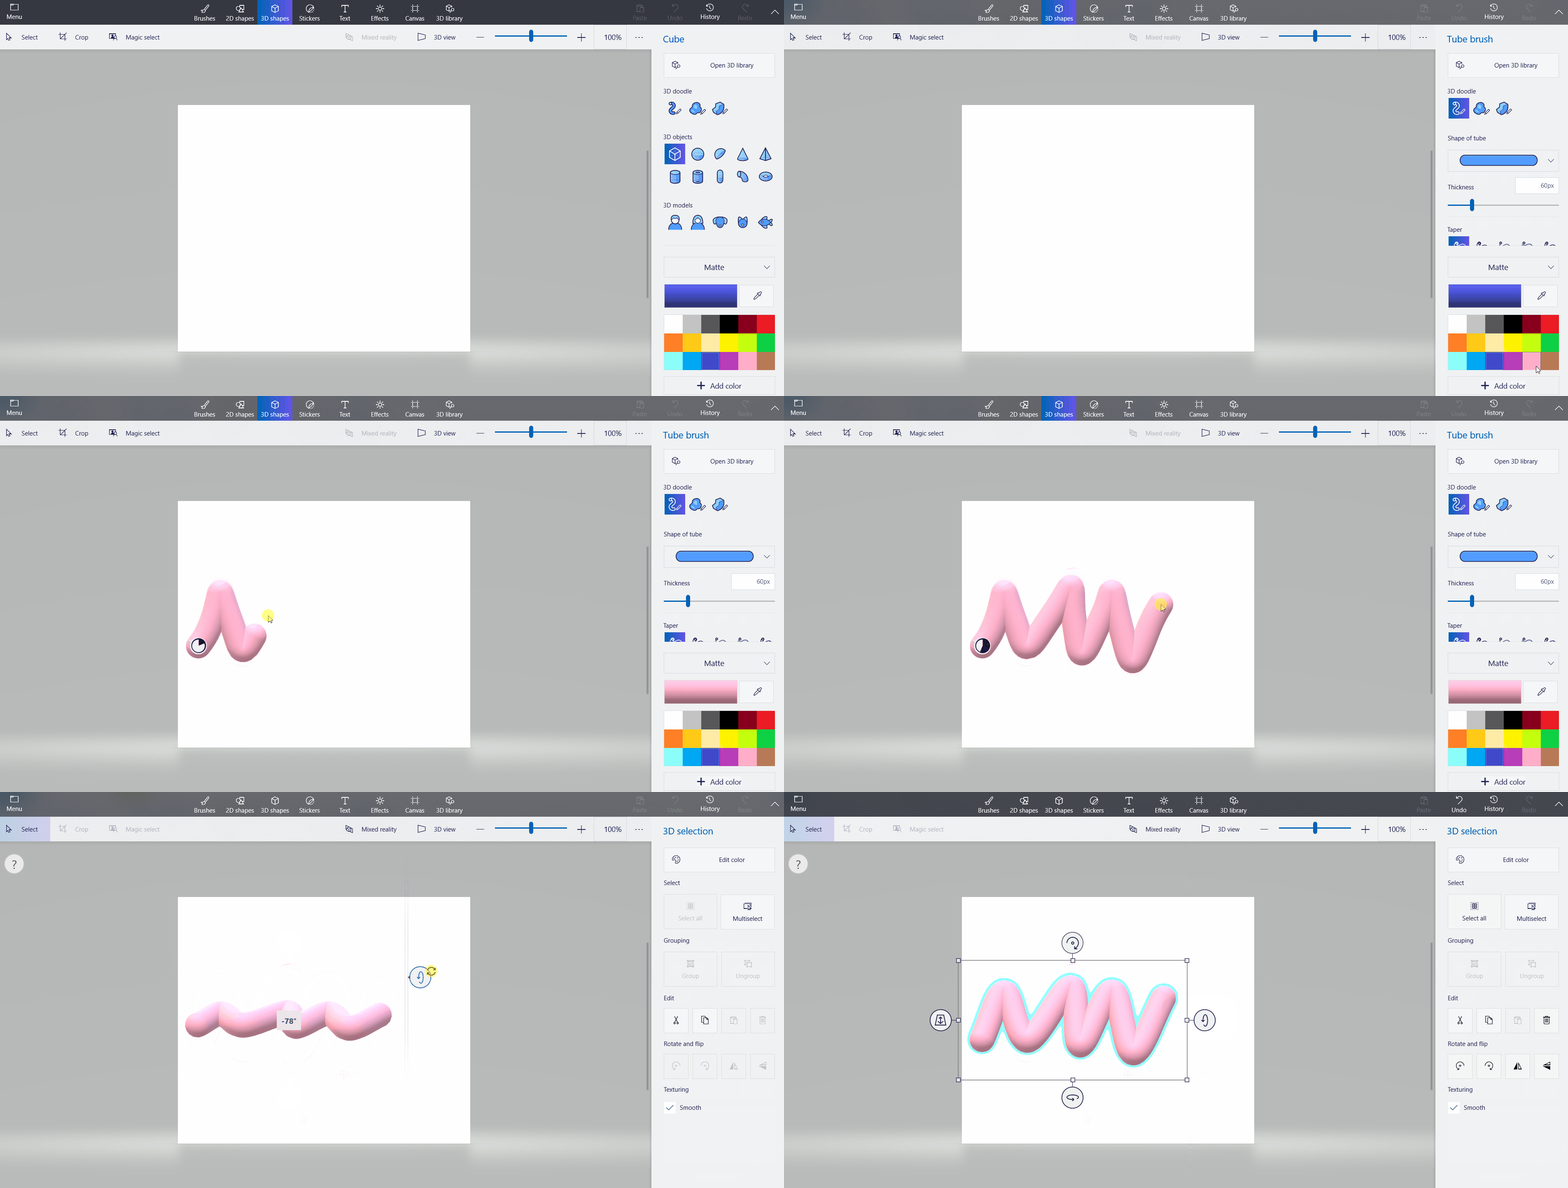
- As an example, let’s insert a 3D doodle. In the options menu on the right, we can select the shape of the doodle, the color, or the thickness.
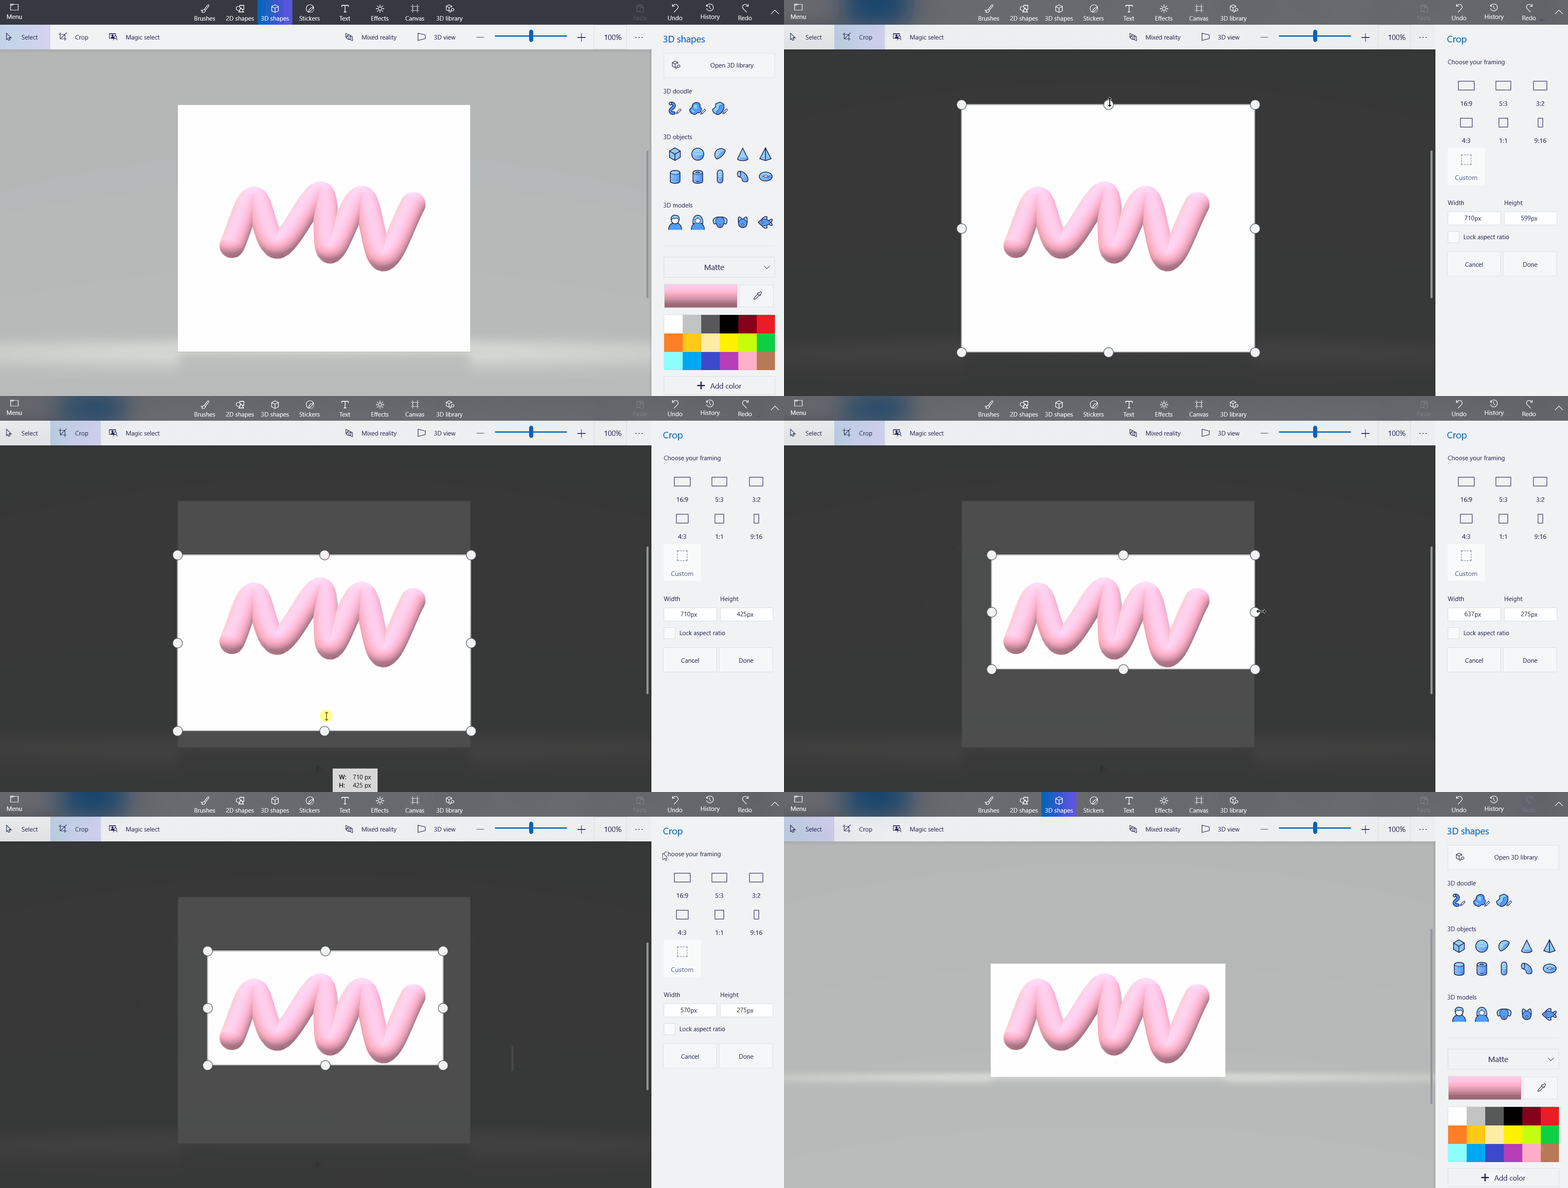
- Let’s adapt the sheet to the size of the 3D element. To do this, click on crop and we adjust.
- After we have finished editing the 3D element, let’s save it on our computer so that we can export it to PowerPoint. Click in the upper left corner on Menu > Save As > 3D Model. Select the folder where we are going to save it and give it a file name.
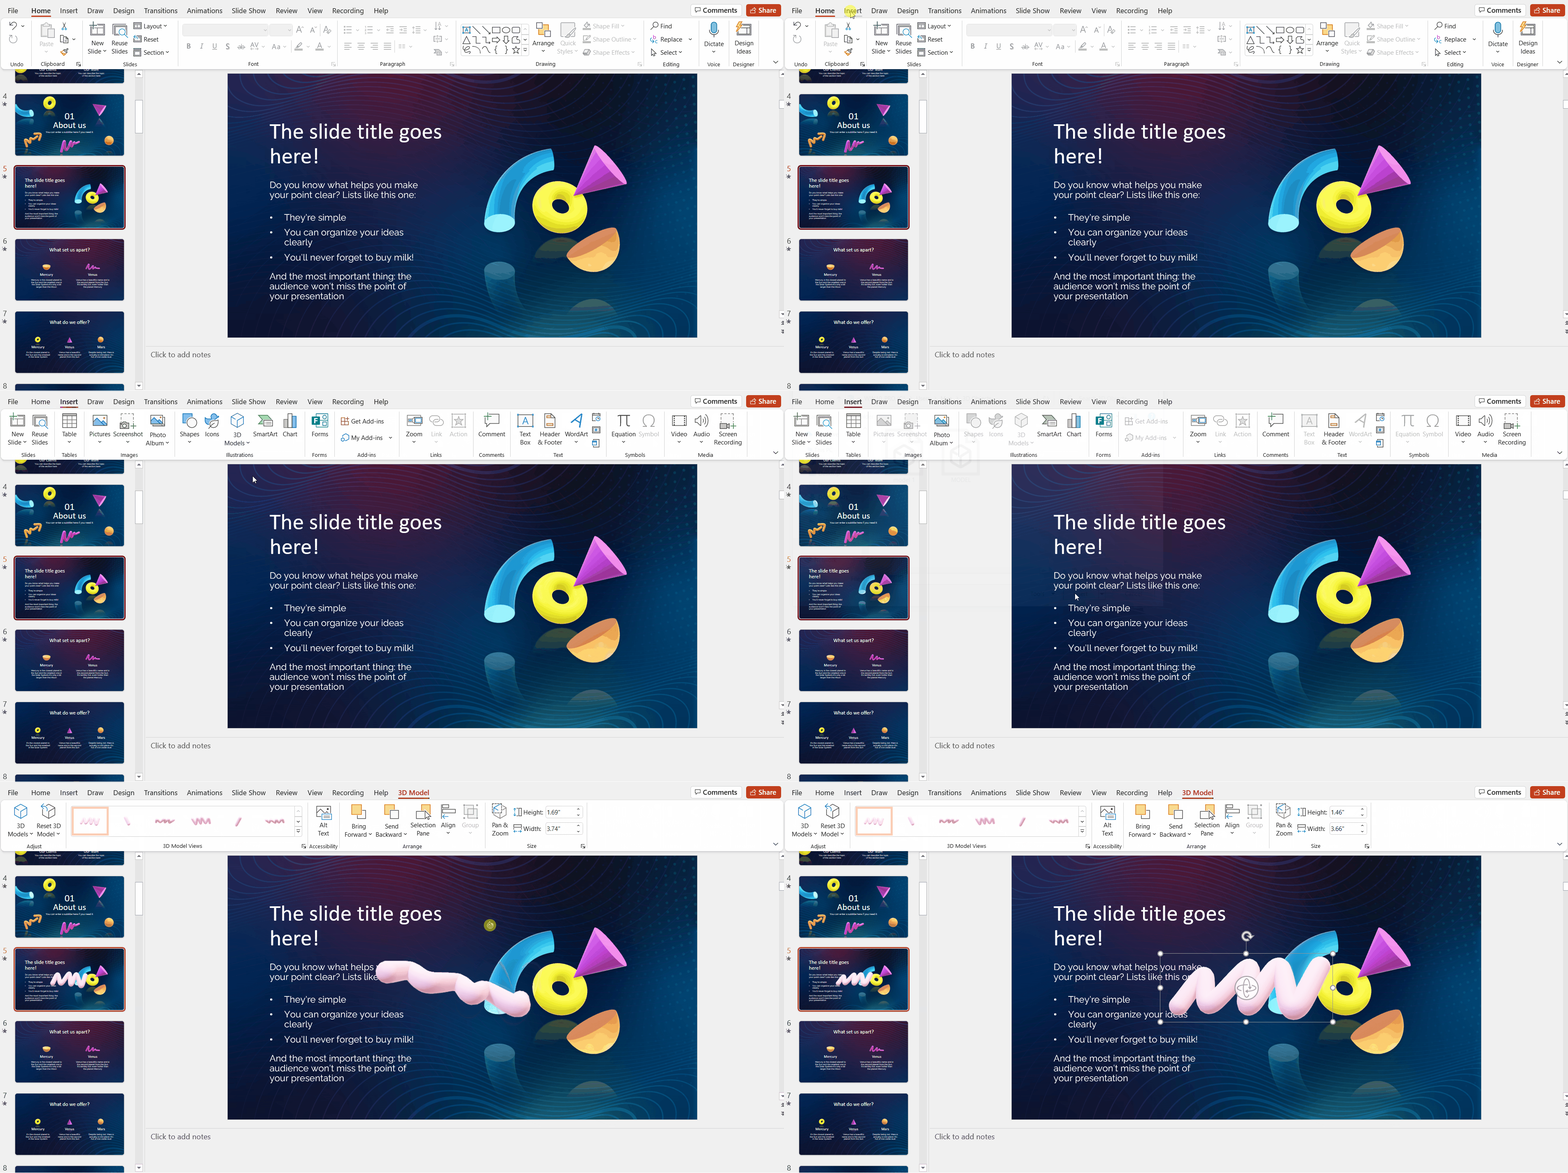
- Now we open PowerPoint to insert the 3D resource into the presentation. Click on Insert > 3D Models > Insert 3D Model From > This device > Choose the folder where the 3D model we created is and insert it.
And that’s it for this post! You can insert and create 3D elements as we have explained, but if you need to, at GreatPPT we have a selection of templates that you can use in Google Slides and PowerPoint Templates with 3D resources included. Either way, start seeing life in 3D!
